 Jump to content


LOLKILLERTOTHEDEATH

-
Posts
716 -
Joined
-
Last visited
Everything posted by LOLKILLERTOTHEDEATH
-
Well no. It doesn't need to be like a 40% buff. You can come up with inverse sledge hammer. Inverse sledgehammer can give a 25% higher damage along with say a 30% longer reload time and the projectile moves 20% faster. Or another alteration can be unstable chemical rounds, which can let Thunder do 40% more damage but 1 damage becomes the new min, just like destabilization for Rail.
-
Yeah Thunder can deal more damage total, but it's quite a bit harder to do that at medium range because It is harder to hit. Also, you can only deal maximum damage to enemies who are 5 metres (or about the length of 1 Viking) close to you. After that there's a drop-off in damage. Frankly Sledgehammer was far more useful without a projectile speed decrease. I actually used stock Thunder and did far better than when I was using Sledgehammer in a Gubhaka. I understand what you mean by certain conditions, but really for Thunder to be truly effective enemies must be about 0-20 or so metres from the user (otherwise projectile speed makes it quite a bit harder to shoot and often times the damage isn't high enough. Essentially that limits it to close range combat of 0 to 50 or 60 metres, which makes it a somewhat close ranged turret.
-
Well Vulcan got incendiary band, which is an indirect damage buff that literally ignores protections with double damage. The only thing that can stop you with incendiary band is probably a titan dome or a solid object. Ricochet doesn't have that bad a problem with alts, because some (such as the plasma torch) let it fire many more projectiles thus dealing more damage. Isida's got the reload per kill which basically means that it too can be extremely powerful. It can be used for endless healing if used properly. Lastly, Placing mines with Magnum does make it much more powerful. As for Thunder, there are loads of protections and no alteration to really help it serve it's purpose as a flanking turret. VUlcan has incendiary band to surpress enemies and lay down cover fire. Ricochet can bounce shots off objects to make kills, Magnums can plant mines to secure a camping area and Isida's can use their alteration to have extra healing power. Yes, Thunder can shoot faster but it's harder to aim and the drop off for damage is a lot.
-
I have rather extensively. In fact I did much better without sledgehammer. That's kind of why. Also this was in Gubhaka.
-
Well I know the sledgehammer does that, but at what cost? 60% loss in projectile speed, which makes it much harder to fight at range, along with a massive drop-off in damage, which given the number of players that use Thunder protections means you do very little damage. I know that asking for a 40% damage boost is not reasonable due to Thunder's reload, but maybe an alteration can be designed that takes this into account and gives a more reasonable damage boost that'll let Thunder have more power but not make ot broken. I do agree with the second point but hope that isn't the case.
-
I feel that all of Thunder's alterations are lacklustre in comparison to alterations for other turrets. For example, Railgun has the Large calibre round which gives a 40% damage increase. Firebird has incendiary mix which gives it a DPS value of 1050. Shaft has the heavy capacitors alteration, which gives it 25% more damage. Striker's uranium rocket alteration gives it 50% more damage. I feel Thunder should have an alteration which increases its damage as well. Seeing as there are are so many alterations for turrets which provide more damage, I feel one of these can be adapted to Thunder.
-
contest Tribute to Archimedes: Pi Day Contest
LOLKILLERTOTHEDEATH replied to Person_Random in Newspaper Archive
Epic contest! It would've been nice if pro battles are allowed. That way, you could use Maclaurin series to come up with progressively better and better values of kills and deaths to gain more accurate approximations to pi, though this would take loads of time Tanki wise. -
Guide The Gaussian Distribution: A Guide to Tanki's Newest Turret
LOLKILLERTOTHEDEATH replied to LOLKILLERTOTHEDEATH in The Gaussian Distribution: A Guide to Tanki's Newest Turret Newspaper Archive
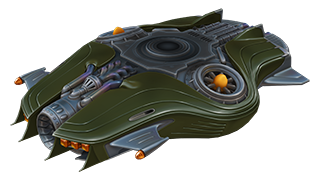
Gauss. To some, a queer and absurd name holding no meaning except for the blatant tactics of Tanki. To others, a memory of the Mathematician Carl Friedrich Gauss and his incredible contributions to Mathematics. Since its release on the 7th of June, the Gauss turret has already become the center of much controversy and discussion. I decided to buy the turret on its release date, (a dream of mine). Since then, I have also managed to learn some of the many tricks the Gauss turret has to offer and am here to bring them to you. The history: Was teased on the xth of the xth, was usable in the test server on the 6th of June, and was finally released X days after it was first announced. Past this, there isn’t that much history to go through, chiefly due to the recent release of the turret. Strengths and Weaknesses of The Gauss As all turrets, the Gauss has strengths and weaknesses. In regards to the former, Gauss has two modes. One for its regular rounds and one for the unique hypervelocity shot (A name which I invented and am hoping catches on soon enough). The regular rounds can be fired off at similar speeds to a Smoky, with slightly lower damage than the Thunder. The hypervelocity shots inflict damage alike that of Railgun and leave you vulnerable for a while after due to the long reload. In most circumstances, the Gauss will be outclassed in close-ranged firefights, leaving you somewhat vulnerable. However, one of the best features of the turret is that using the hypervelocity shot (much like Striker’s salvo with the lock-on feature) does not laser-point a target, thus allowing you to stealthily fire shots and destroy enemies if they determine your location. Lastly, the Gauss also has splash damage, which means it can be used to eliminate enemies quickly. Despite these strengths, the Gauss also happens to have its weaknesses. One of the most significant flaws being that the Hypervelocity shot takes too long to charge up for close-ranged combat while the rapid-fire shots won’t be able to eliminate enemies fast enough. As a consequence, it is best not to engage in close-ranged combat unless necessary. Hulls with regards to the Gauss Wasp: Wasp and Gauss are a relatively weak pairing. The primary drawback here is that Wasp lacks the armor needed for longer range combat (as long-range combat typically involves Magnums, Shafts or Railguns, turrets which can easily 1-shot a Wasp). Due to the self-damage, low armor and weak close-ranged capabilities of the combination, capturing flags/points/goals is not particularly viable either. Lastly, there is little synergy between Wasp’s overdrive and Gauss, unless one counts the swift destruction being rewarded with an overdrive bomb as counting. Hornet: Hornet and Gauss are a decent pairing. While Hornet still doesn’t have the ideal amount of armor for sporting a medium/long-ranged turret, it does allow users the durability needed to engage in long-ranged battles provided enough care is taken. The speed and drifting of this hull lend Hornet well to locking on to moving targets as well. Similar to Wasp, Hornet lacks the robustness for capturing flags and points, however capturing points is no longer as big of an issue. There is good synergy between Gauss and Hornet’s overdrive, as Gauss can deal with some severe damage between its hypervelocity and rapid-fire shots if opponents cannot protect themselves. Hunter: Hunter and Gauss are a good pairing. Hunter finally presents the needed armor for adequately taking part in long-ranged combat while being able to handle the recoil and having sufficient speed to utilize Gauss effectively. Hunter’s armour also lends it well towards capturing flags and points, as Hunter can move in an agile manner and not be completely knocked off course if it is hit. Unfortunately, there isn’t too much synergy between Hunter’s overdrive and Gauss. However, the overdrive can be used to help destroy enemy tanks reasonably quickly. Viking: Viking and Gauss are the perfect pairings. Viking brings to the fray a good amount of armor and speed, as well as the ability to drift (enabling users to lock on to faster enemies at lower ranges). This pairing can capture points with ease, and with a little bit of skill and luck, flags and goals also come into the picture as the self-damage isn’t nearly as significant now compared to lighter hulls. Viking’s overdrive and Gauss have incredible synergy together as Gauss can quickly fire off high damage shots with high frequency, and if used optimally this can be enough to turn the tide of most any match. Dictator: Dictator and Gauss are an awkward pairing. Dictator’s somewhat irregular and strange shape makes it harder to use Gauss due to the poor hull dynamics for the turret. Furthermore, Dictator lacks the acceleration and drifting to be able to have any level of proficiency in close-ranged combat, let alone the ability to lock on to enemies. Although Dictator presents sufficient armor for capturing flags, points and scoring goals, the relatively mediocre movement dynamics hinder it from adequately doing so. Lastly, Dictator’s overdrive and Gauss have little to no synergy, acting akin to the old overdrives. Titan: Titan and Gauss are a somewhat exciting pairing. Due to Gauss performing akin to Striker and Smoky, two of the most heavily used turrets with Titan, Gauss, and Titan can be paired together relatively compatible. The armor and speed of Titan can enable users to take hits and hunt down enemies in relatively open spaces. While this combination can capture points quite well, it is unlikely to be well suited towards capturing flags or goals. Titan’s overdrive also works decently with Gauss, especially at closer ranged fights, providing nigh invincibility except against a Hornet, Hunter or Mammoth’s overdrive. Mammoth: Mammoth and Gauss are not a particularly fantastic pair. Mammoth, though boasting armor matched with Titan, lacks the speed needed to be able to lock on to targets at closer ranges. Combined with the slow turning speed of Gauss, the user will likely be left helpless in the face of close to medium ranged turrets. Due to its large size and low speed, Mammoth will most likely be unable to capture any flags or goals unless using its overdrive, although capturing points is relatively easy. Mammoth’s overdrive and Gauss can go together quite well, primarily due to the user being able to destroy nearby enemies with the overdrive and focus on picking off enemies at a distance. Using overdrives optimally Regardless of synergies between overdrives, one of the most important things for a player to know how to do is to make the best use of their overdrive while it seems like a task for a simpleton, the unique overdrives for every hull call for novel approaches to maximize their benefit as well. Wasp: Due to Wasp and Gauss’ somewhat lackluster synergy, the bomb and Wasp don’t go together as well as one might hope. Nonetheless, the optimal way to use it is like a Ninja. For example, if you are trying to eliminate an enemy with a flag, then a logical approach is plausible. First, fire a shot roughly so that your enemy thinks that you are behind them. This is likely to cause them to slow down and turn their turret to check, at which point you go a little bit ahead of them, plant your bomb and get out. By the time they realize that you had planned it all out, they’ll be blown to bits. Sometimes finding crowded areas and planting bombs there can also work Hornet: Hornet’s overdrive pairs quite well with Gauss. As Hornet’s overdrive enables you to ignore enemy protections and double armor, you can destroy enemies with ease. Furthermore, the enemy location revealing allows you to track enemy movement and see enemies hiding at longer distances and lock on to them as their marker may move or change. As a general rule, when activating Hornet’s overdrive, the user should have full or nearly full health with at least double damage being activated. Lastly, it is worth noting that Gauss’ stealth can aid significantly in destroying enemies and can render you nigh immortal if appropriately utilized. Hunter: Hunter’s overdrive and Gauss don’t have poor synergy. However, some relatively minor issues prevent players from capitalizing on it. Chiefly, to activate the overdrive (and have it work), one must be reasonably close to enemies. This means that to get the maximum benefit from this overdrive, you should activate it near a group of enemies, begin to lock on while reversing back and destroy them. This strategy requires a stealthy approach towards your enemy as well as double damage (otherwise your enemies will quickly disperse, and you will have only wounded them). Viking: Viking’s overdrive shows a fantastic synergy with Gauss. Viking’s overdrive increases the parameters of your turret, particularly the damage and reload speed for about 7 seconds. As a result, the best way to use this overdrive is to find a group of enemies, activate double damage and your overdrive and blow them apart. On the flip side, sometimes using an Overdrive defensively, such as to stop an enemy from capturing a flag is also equally useful. Generally peaking, avoid spending your overdrive on some random enemy as it can be the difference between victory and defeat. Furthermore, when activating your overdrive make sure you can see plenty of enemies and are not in a confined space with your teammates, as it is likely to be wasted if your team is blocking your shots out. Dictator: Dictator’s overdrive and Gauss don’t have a fantastic synergy. However, the duo can be made to work. Dictator’s overdrive revitalizes a player’s supplies, regardless of what supplies they have active for how long (much like how overdrives worked before they were changed to be unique to every hull) and induces a slow-down in an enemy movement akin to Freeze. As a result, the best way to use this overdrive is with as many teammates as possible and to sneak behind enemies and then use it, to slow them down long enough for you to quickly eliminate them. Titan: Among all the overdrives in Tanki, Titan’s overdrive is the only one which will force you to stay in one place, as activating Titan’s overdrive dome of protection and then leaving it will not be of much help. As a result, to maximize Gauss’ synergy with Titan’s Overdrive, it is vital to find a location where you can quickly and consistently camp as well as have an overdrive to eliminate enemies. Once in the safety of your dome, eliminate Hornets, Hunters, and Mammoths before anything else as they can ignore you defenses (protections, dome resistance, and double armor), deactivate your dome and deal damage that cannot be shrugged off respectively. Mammoth: As far as overdrives go, Mammoth’s overdrive is nearly as divorced with Gauss as Wasp’s. Nevertheless, Mammoth’s overdrive can be broken down into two key components. The unrelenting, brutal damage with extra speed and invincibility. The former part is likely to be annoying to use as it requires users to discard the advantage of stealth which Gauss has, and assuming one can get to enemies in a mere 5 seconds, being at their mercy afterward. The latter, however, can be used in the direst of situations where survival is essential, such as being extremely low on health and needing to lock on to an enemy. Gamemodes CTF: One of the weaknesses of the Gauss turret is close-ranged combat. Consequently, it is ill-advised for players to focus on capturing flags since Gauss isn’t designed to be that kind of a weapon. Instead, Gauss is oriented towards stealth, so flanking enemies from the side is perhaps the best idea. “Gee, LOLKILLER! Big explosions and an ugly turret? Stealth?” Why yes, dear reader. Firstly, Gauss shots are small and nearly impossible to track due to it. Secondly, even preparing to fire a hypervelocity shot doesn’t trigger a laser to ruin your camping. Combined with the high fire rate, being wasteful isn’t a real problem. Naturally, there are sub-strategies to CTF (which will be covered shortly), but the general strategy you use should be built around flanking enemies, whether it be camping, mobile camping or just aiding in assaults. Prioritize enemies who may pose higher magnitudes of threat (enemies with flags; enemies trying to kill your teammates with flags). Make sure that you use your greatest weapon! Stealth is critical with Gauss as everything else is about average (although when put together can provide you with a fantastic performance) and therefore using this advantage can make you invincible without any overdrive against enemies meters away. DM: Out of all the game modes you could choose for using Gauss in, DM’s are arguably the worst. Firstly, Gauss loses the stealth that makes it fantastic as enemies can spawn at any location of the map and destroy you. Secondly, Gauss lacks the firepower needed to dice with enemies up close and the lock-on abilities to engage enemies at more considerable distances (since you will quite often be fired upon heavily). Nevertheless, if you still prefer to use the Gauss, it would be quite wise for you to be as mobile as possible (as camping will give you away much too quickly in most cases) and focus primarily on enemies who have already been damaged. If you wind up with one of the annoying “in your face” range enemies, then lock on to them to try and use your impact force to push them away. Nevertheless, unless your target is entirely or almost entirely disabled, it is not a good idea to lock on, and therefore the regular rounds should be used instead. Nevertheless, if you intend to fight enemies up close and personal at ranges where you can keep up long enough to lock on to them, you may be able to rack up kills due to the low splash radius (and consequently self-damage). CP: Much like CTF, this mode involves players rushing to something. In this case, multiple points. Since the enemy team is not united under the banner of attacking a single location like in the case of CTF matches, it is much easier to destroy enemies when they are exposed and trying to capture points. While this may seem problematic at first due to enemies wielding longer-ranged turrets, Gauss’ great stealth advantage once more comes to the fray, allowing you to flank enemies with ease without worrying about being seen. As for playing a more prominent role in battles, capturing points is entirely viable, although territorially speaking should only be done on neutral or ally territory to stick to medium to long-ranged combat while earning some extra points for yourself. If you do decide to guard a specific location, it’s best to find some cover near the point and use the zoom feature to be warned of any incoming enemies quickly. TDM: Without a doubt, this is the best game mode for one to use Gauss in. Due to the lack of a prop, enemies and allies don’t go to the other side unless they are donning short-ranged turrets, which means that you can maintain a safe distance and savagely attack enemies without even being seen or heard. In this game mode, priority should be given to teammates who are fighting enemies to help them out in the event that they are struggling or avenging them (and get a better result) if they are destroyed. As a general rule, the best playstyles for this mode are camping and mobile camping as they allow you sufficient distance and you can have allies watching your back (if they are also camping along with you). Rugby: This game mode is a variation of CTF in that either team seeks to take a prop owned by neither team to the other team’s goal. Generally speaking, Rugby will see you fight enemies in waves rather than without order. These “waves” will likely begin when your enemy team has the rugby ball as most members of the enemy team will try to launch a coordinated assault on your side. The inverse of this is if your team is trying to launch an attack on the enemy team. In either instance, following your team leads to close-ranged combat (having enemies come to you in a relatively smallish territory and going to the enemies’ somewhat small base and attacking them). Thus, the best thing to do is to be a camper or a mobile camper in neutral places which are harder/longer/ unneeded to be reached by either team so that you can flank your enemies as they attack your base or provide support to your team as they launch a raid. Utilizing this strategy will more often than not see you fighting over more considerable distances, so locking on is a better idea than the regular shots. Assault: Seeing as Assault can consist of pure attack and pure defense, I have decided to split it up as the red and blue teams, respectively. Red team: Since the red team is attacking and Gauss is not suitable for close quarter combat, the best strategy here is to do something similar to what you did in Rugby; finding a neutral hard/needless to access location that can provide you with enemies and then flank them. Flanking enemies who are an obstacle to teammates with the flag is a priority. On the flip side of things, if you decide to camp near the enemy base, it is essential to find large amounts of cover and use zooming wisely to assess potential threats. In general, terms, the closer you get to the enemy base, the slower (and more armored!) enemy hulls become. As such, it is wise to use the lock-on feature for a quick peek-shot and then to retreat to the safety of your cover. Although attempting to score a flag is not logical, it can be done in conjunction with your team, although as with any Gauss related task, this should only be done with a high degree of stealth. Blue team: As the blue team is defending, you’re likely to experience something similar to Rugby but at smaller proportions. Since most maps have three flags for the red team, this generally means three somewhat unrelated waves of attack, consisting of anywhere from just the one flag carrier to about four players in total. Consequently, it is ill-advised to stay near your base unless you are taking cover and are safe due to being surrounded by teammates with heavy hulls. If this is not the case, it is a good idea for you to find a neutral area from where you can safely destroy enemies. Juggernaut: Juggernaut is similar to DM, so one might expect to find misery. However, this is far from the case. Since the Juggernaut mode is everyone else versus a single tanker (or it winds up being as such), the best thing to do is to keep a distance from the Juggernaut and destroy any tanks trying to approach the Juggernaut. You will want to find the goldilocks zone to do so, as being too close to the Juggernaut will most likely destroy you and being too far away won’t land you any kills. When in the goldilocks zone, keep in mind that unless an enemy is wholly unprotected (by double damage and Gauss protection), you won’t be able to kill them quickly. As a result, it is vital to wait until they are damaged significantly enough such that they can be killed with a shot or so but not more. Lastly, in regards to timing, you should use your lock-on feature to lock on to enemies as soon as the Juggernaut sees them, as the Juggernaut’s Railgun can fire off twice faster than Gauss locks on once. If the Juggernaut’s Striker is used, it’s wise to lock on less than half a second later so that the Juggernaut can land a rocket or two before you finish off the tank. Playing styles: Not to be confused with roles, playing styles are the way you battle your opponents as opposed to your principal techniques that are the roles you play. Playing styles vary from person to person and are usually a bit mixed up, although they can nonetheless be separated into distinct styles regardless of this. The hippie: No, not the kind from the 1980s. In certain games, the technique of firing without using an aiming mechanism (such as a scope) is often called “hip-firing.” This style is exactly what it sounds like. Players who use this style are often armed with the lighter hulls (chiefly Hornet) and tend to drive around shooting at anything that crosses their path, never really locking on to an enemy but instead unleashing a volley of shots where possible. Since the Hypervelocity shot is not utilized in this style, playing like this will require delicate fingerwork and also quick strategizing, two things which may not be for every tanker. If this is not exactly your cup of fuel, read on about the ODD. ODD (Obsessive Destructive Disorder): This playing style is meant for those who love to see bolts of lightning cackle and the enemy horrified as they lose at least about a third of their health instantly and involves only using the Hypervelocity shot. Most of the time, this playing style is well complemented by the use of Viking, although it can be made to work with Mammoth or Titan. This playing style is generally well supplemented by the use of camping and mining, as well as an ability to keep an eye on any tank that might pose a threat present or future as well as mines. Furthermore, this playing style emphasizes newly spawned enemies. Merchant of Death: Destruction! Buy some Tanki destruction! This role is for the craftiest of players who have no problems with indulging in some of the most detestable behaviors. This playing style requires quick thinking, fast-moving, cold-blooded opportunists to steal kills, flip over enemies, and use repair kits at the last moment. When playing like this, it doesn’t matter what shot you have to take or what’s at risk; you go through whatever’s needed to destroy enemies. Roles: Unlike playing styles, roles in a battle have to do with how you are as a player rather than as a Gauss user. Once more, these roles aren’t all that concrete. The Wolverine: No, this role has nothing to do with being invincible. It has to do with Persistence. The Wolverine demands a player who’s unconcerned with their survival but only with the glory to be earned through capturing flags or scoring touchdowns. Regardless of how many times or how badly they are destroyed, these kinds of players don’t stop attacking as savagely as an animal. The goal here is to whittle down your enemies’ patience and get them to lash out in anger, losing their cool and leaving their team vulnerable in the process for another capture a flag/score a goal or to keep trying and capture a flag or score a goal eventually. Alternatively, it can be taken in a different sense, and you can keep infiltrating the enemy base and attacking anything that moves. If you’re one who likes their K/D to be nice and high, perhaps try out the Mr. Outdoors. The Mr. Outdoors: This role is for players who particularly enjoy the challenge of having a nemesis and destroying enemies while remaining unseen. In essence, this is what often gets called “Camping” in Tanki. To perform this role optimally, it is vital to find a location that is difficult to get to or is completely off the beaten path. Then, it’s a good idea to mine up possible sites of enemy entry as well as potential to cripple any incoming enemies if not terminate them. However, you should strive to destroy enemies when you see them coming. One of the other things about this playing style is that it requires you to abandon gold boxes, overdrives and in most cases even any props that may be included in the game to live a life of pure destruction. If you don’t have much interest in altogether abandoning flags and points and rugby balls but also not letting go of a decent K/D ratio, perhaps The confused is for you. The confused: This playing style places a heavy emphasis on being flexible and able to move between an unstoppable attacker and an unbeatable defender. In essence, these players need to be very observant to deduce simple facts on the go, such as who has the flag and possible interception routes or where minimum enemies are located. In the case of Gauss, this looks to be a more distant experience in the sense that regardless of which part of the role you play, a good bit of distance is there between your enemies and yourself. Furthermore, this playing style strikes an elegant balance between Wolverine and The Mr. Outdoors; thus, you can’t afford to have tunnel vision. As a consequence, this style neither gives you the ability to destroy or purely work with props. Nor does it allow you the choice of dying as many times as needed or staying untouched by the heat of the battle. You may need to work with props when needed and destroy enemies when required. You may even have to sacrifice yourself for the victory of your team. If you find it to be somewhat dull and uninteresting to have the predictability of your actions, perhaps the shoot me if you can, I’m a Mathematics man is for you The shoot me if you can, I’m a Mathematics man: This role is the Gauss variant of a Sapper. The primary objective here, is to focus your fire on a single enemy long enough for them to lose their cool and begin attacking you, and then repeating the process with as many enemies as possible so as to make them lose any element of teamwork and planning they might have, at which point the match can be won fairly easily. Generally speaking, a faster hull is better off for this role as enemies will likely come after you and viciously try to destroy you. Furthermore, the ideal way to play this role is through remaining in hiding for as long as possible, routinely changing your camping position to agitate your enemies even more while maintaining a higher K/D ratio. Some statistics I believe that this picture suffices in terms of explaining the need for this section. If you wish to see the Mathematics behind my conclusions, open the spoiler. If not, skip over it. What this means using arcade shots: 68.27% of the time your damage will be between 642.5 and 767.5 50% of the time your damage will be more than 705 50% of the time your damage will be less than 705 2.228% of the time your damage will be 580 or less 97.72% of the time your damage will be 580 or more 15.87% of the time your damage will be 767.5 or more 84.13% of the time your damage will be 767.5 or less 15.87% of the time your damage will be 642.5 or more 84.13% of the time your damage will be 642.5 or less 2.28% of the time your damage will be 830 or more 97.72% of the time your damage will be 830 or less 0.13% of the time your damage will be 892.5 or more 99.87% of the time your damage will be 892.5 or less What this means using hypervelocity shots: 68.27% of the time your damage will be between 1638.75 and 1851.25 50% of the time your damage will be more than 1745 50% of the time your damage will be less than 1745 2.228% of the time your damage will be 1532.5 or less 97.72% of the time your damage will be 1532.5 or more 15.87% of the time your damage will be 1851.25 or more 84.13% of the time your damage will be 1851.25 or less 15.87% of the time your damage will be 1638.75 or more 84.13% of the time, your damage will be 1638.75. or less 2.28% of the time your damage will be 1957.5 or more 97.72% of the time your damage will be 1957.5 or less 0.13% of the time your damage will be 2063.75 or more 99.87% of the time your damage will be 2063.75 or less Hull destruction related properties (following the same conditions as above but also enemies with M4 equipment) This section was created thanks to the help of players @Past and @aqwzsxedc. As opposed to the earlier mentioned facts, this section serves as a slightly more applicable and practical application of Mathematics in Tanki. This data was obtained experimentally and with a little bit of pure calculation. Chances to destroy enemies while you have double damage and they have neither protection nor double armor and are being locked on to: 100% chance to 1 shot a Light hull at M4 0% chance to 2 shot a Light hull at M4 96% chance to 1 shot a Medium hull at M4 4% chance to 2 shot a Medium hull at M4 0.82% chance to 1 shot a Heavy hull at M4 99.18% chance to 2 shot a Heavy hull at M4 In conclusion, Gauss is a powerful new addition to the garage of almost any tanker. Its relatively new release ensures that you can dominate battles by using its versatile arcade and Hypervelocity shots. In general, the playing style needed by the newest turret requires a great deal of stealth, but if pulled off correctly can turn the tide of matches.- 13 replies
-
- 21
-

-
Valid Shooting teammates has 0 impact force
LOLKILLERTOTHEDEATH replied to LOLKILLERTOTHEDEATH in Shooting teammates has 0 impact force Ideas and Suggestions
I think that when shooting teammates there shouldn't be any impact force at all. I often take a supply only for someone who thought that it "belonged" to them to come and shoot at me and waste time I could use to earn stars. Most of the time, the effect of impact force on teammates is only used to troll and as such I think if it could be lowered to 0 it would be great. -
Title says it all! This topic is for discussing strange and possibly uncommon hobbies which don't violate forum rules. Mine are (in no particular order): Collecting certain action figures Eating corners of chicken nuggets (or similar food items) before eating the rest Removing glue when it gets stuck on my hands (which doesn't happen often but somehow these web like structures are what I remove and I find it to oddly entertaining)
-
Valid Phasing through allies
LOLKILLERTOTHEDEATH replied to LOLKILLERTOTHEDEATH in Phasing through allies Ideas and Suggestions
Often times off late, players keep pushing my hull around and shooting at me because I take "their" box (even though I was patiently waiting there first; there was even once an incident where some player waited a minute or so and didn't let me go because he "knew" that I would "steal" his overdrive). Other times, if you don't give someone the flag you spent resources trying to bring back, they'll push you and keep you pushed against a wall. My idea to solve this is to allow you to press a button which will make you untouchable by that specific tanker (a maximum limit of 3) for a minute. Much like how it would be when tankers first spawn, except that only those tanks are unable to touch you and you are normal to the rest of your enemies. Coming within a 7 metre radius of gold or supplies disables this function. -
Valid Automated messages when a certain action is completed
LOLKILLERTOTHEDEATH replied to LOLKILLERTOTHEDEATH in Automated messages when a certain action is completed Ideas and Suggestions
My suggestion is that upon completion of a certain action, a text box appears above your tank with a message. For example, if I am invading the enemy base with my Wasp in the hopes of stealing the flag and I use my overdrive, I feel it would be nice if I could say something like "Merry Christmas" to my enemies. Potential actions include: Taking a gold box Overdrive use Capturing a flag Your message would be something you decide, however it may be limited to 5-10 words (appropriate ones). Perhaps such a feature could be sold for 1$ or any price Tanki sees fit, but depending on the specific occasion, so buying an auto-text for "overdrive use" won't be triggered when capturing a flag.- 15 replies
-
- 3
-
-
- Cosmetics
- New Feature
- (and 1 more)
-
Valid Private servers
LOLKILLERTOTHEDEATH replied to LOLKILLERTOTHEDEATH in Private servers Ideas and Suggestions
I think that Tanki should add private servers to Tanki. What I mean by this, is essentially that tankers have the ability to rent out an entire "server" for themselves. Essentially this is just a set of 5 battles which can be viewed through a special "my server" section. That sounds quite lame, but I would hope these aren't ordinary servers. When buying out these servers, tankers get the option to go back to ANY time in the past of Tanki. For example if I really wanted to go back to Xmas of 2013, then I could select this as the time and everything would look and perform like it did then. The key difference would be that anything I buy on that server doesn't come to the real Tanki server but stays there. Furthermore, the shop gets modified according to the time, but the crystal and such prices don't change. Lastly, if I go to pre-rebalance, then my crystal count is divided by 10 for that particular server. I know that ideas regarding bringing back old features aren't accepted, but this isn't really bringing back, it's just a sort of "Time travel" for players wishing to go back to a certain time. Naturally, given that it'd probably take up loads of Tanki space, these servers could cost something like 500 USD (not exactly, I don't know what is and is not reasonable) per year. Lastly, you are limited to a time of 3 hours per day on the private server.- 12 replies
-
- 5
-
-
- New Feature
- Servers
- (and 1 more)
-
Review LOLKILLER'S Garage Analysis - Part 1
LOLKILLERTOTHEDEATH replied to LOLKILLERTOTHEDEATH in LOLKILLER'S Garage Analysis - Part 1 Newspaper Archive
My tanki career began when my younger brother’s friend introduced him to Tanki, explaining how it was enjoyable to play. At first I merely brushed off the game, however after watching my brother and his friend play, I decided to give it a shot, naming my account LOLKILLER initially (a name taken from a Dino Storm player) and added the suffix “TO THE DEATH” when I found out I could not be “LOLKILLER.” Since doing so, I have managed to come a much longer way than I would ever have expected to. A brief history of me: Before starting to play Tanki, I played a game called Dino Storm. If a person says that Tanki is too hard, one ought to try that game. The equivalent of a micro upgrade can take weeks if not months at the highest levels especially with recent updates to the game. Trying Tanki out was quite a different experience, and I was terrible at first but as with most things, time was the only cure. One of my first aspirations in the game was to become a reporter. At the time, there was a reporter by the name of Trinitrotoluene, who essentially became a sort of mentor to me who helped me better my writing and above all, become more confident. Without his kind help, I doubt I would be playing Tanki at all as he helped me keep my dream alive. It took me multiple attempts to try and become a reporter (in fact I’m pretty sure I got accepted because Flexoo and other reporters didn’t want to see me apply ever again) After spending a few brief months in the AWS with help from Marc and Destrod, I finally did become a reporter in mid 2018. Eventually becoming a reporter was a dream come true, and getting to work with such distinguished writers of the reporter team was also a phenomenal learning experience and extremely fun. Since then, my garage has seen a great many new items and hopefully continues to get better and better. Consequently, after having read a whole mess of garage analyses of other tankers, I decided to write my very own. A tale of my garage’s evolution which nobody asked for. The M0 Stage My M0 stage saw me getting a variety of different equipment for a plethora of different situations. At the M0 stage, my time spent was mostly characterized as a noob. I didn’t really know how to play terribly well, but I knew that someday I wanted to have a garage with many M3’s as most Generalissimo at the time did have. As you will find out, I had no financial sense or idea on how to use my crystals properly, and this showed through all but my M3 stage perhaps. Wasp M0: This hull was my very first purchase. I decided to pursue Wasp M0 because I saw a player absolutely destroy me and a good many others in a Death Match. I was quite impressed by the agility and speed of this hull, however, when it came time to actually engaging an enemy, I found myself somewhat helpless. At that point, I realized that speed could get me far, but not half as much as I needed to get, thus leading me to purchase what I did next. 8/10 Mammoth M0: Most people (incorrectly) say that the recipe for success is a balanced life. I, however, beg to differ, or I did back when I bought Mammoth M0. I have always had a peculiar fascination with in-game characters or avatars which allowed me to shrug off immense amounts of damage and Mammoth M0 was no exception. As soon as I purchased Mammoth M0, I jumped right into a battle, and unsurprisingly got crushed because I was slower than a turtle. Why? Well, I bought a turret in conjunction with Mammoth which DOES NOT work with Mammoth. 6/10 Railgun M0: I purchased Railgun after being wholly obliterated in multiple matches by enemies using Railgun. I thought that having the turret which could crush me would be a real benefit. Sure it had a slow reload, but Mammoth M0 could compensate, right? WRONG! Mammoth and Railgun were perhaps the worst combos I could have made. I discovered that Mammoth and Railgun had some objection to turning and that I would have to wait until my uncooperative enemies stood completely still to destroy them. Later on, though, Railgun M0 served me quite well and even went on to become my favorite turret for a while. 9/10 Firebird M0: After spending my life savings of about $3.14 USD lots of time trying to gain crystals using my Railgun and Mammoth, and when I finally had enough, I decided to buy Firebird M0. Needless to say, I had all but abandoned Mammoth M0 due to its slow speed and decided to use Wasp instead. While Wasp provided me with speed to catch up to enemies, Firebird lacked the damage needed to destroy enemies due to its (at the time) low damage as well my lack of common sense. 7/10 Hornet M0: A few hours after purchasing Firebird M0, I had to make what seemed like a life-changing decision. To buy Hornet or not to buy Hornet (as the fabled William Shakespeare might have said). In the end, I decided to give it a shot. For whatever reason, I found Hornet’s performance to be a significant improvement on Mammoth’s slow speed as well as Wasp’s lackluster armor. When used with Railgun, I found the combination to be absolutely amazing! 9/10 Thunder m0: I purchased this turret in the Warrant Officer ranks, once again after seeing it’s brutal power. Thunder seemed to be entirely compatible and capable with my Hornet, and most people were destroyed within a mere two shots, which was all the more incentive for me to use the turret. My decision to buy it was based on an obsessive phase, during which I watched every single Thunder M3 gameplay video I could find. In the end, my Thunder M0 saw little use, although I still loved the turret. 8/10 Isida M0: I had heard various rumors about how staying up to some odd time in the morning or using silver bullets had to do with Vampires. Little did I realize, I was going to meet one for myself in a Rio Capture the Flag match. I was using my Railgun and Hornet, when one particularly durable Isida user came and managed to destroy me, despite my use of all three supplies and his lack of double damage. I decided to investigate the matter further, and found out that Isida could steal the opponent’s health! From then on, I saved my crystals like anything so I could witness Isida’s power first hand, and it was quite spectacular to me. The self-repair functionality made me feel like I was doing the Mark 42 armor (a childish notion but quite fun no doubt). 9/10 The M1 Stage At this point, I began to encounter enemies using M1 turrets and hulls and found myself utterly outmatched by these opponents. As such, I decided that it was about time I stopped collecting M0’s and used my currently existing garage to help me get more M1s. My garage at the time did cover me for most situations, and where it didn’t, I simple persisted through in the form of repeatedly being spawn killed. Viking m1: My first ever M1, and also a MAJOR source of stress (a story perhaps for another day), this hull was quite disappointing to me at the time I got it. I bought this hull in conjunction with Isida as I liked healing my teammates, but I was utterly disappointed when I used it and more often than not struggled to destroy an enemy or heal a teammate. In a nutshell, it didn’t feel fast enough or armored enough for virtually anything. I was somewhat obstinate about using Isida m1, so at that point, this hull fell into disuse. For those who might not be familiar with it, the "i" is a symbol for the square root of negative one. i/10 Isida m1: I chose to go with a healer set up for a single reason because it gave me the thrill of being like Ratchet, the Autobot medic from transformers. One of the lessons I learned from playing with isida was that it wasn’t for everybody. Using an Isida requires a person who’s willing to make the team play and sacrifice themselves to help their teammates, an attitude that would not develop in me until about 2018. Consequently, in conjunction with Viking m1, I struggled to get anything done with this turret as I was almost always obsessed with being the star of the team. 8/10 Titan m1: Titan had never much appealed to me as a fantastic hull, and consequently I decided to discover what the so-called pro battle pass was before acquiring the hull and then go for Titan. Once I did go ahead and get Titan, I only really used it for a single match, during which I was unable to perform exceptionally, and didn’t bother trying out Titan ever since. I have heard lots of talk about how amazing Titan is, so I do hope to get it in the upcoming 2019 April Fools day sales to give Titan another shot. 5/10 Dictator m1: Perhaps my favorite hull at the m1 stage was Dictator. I literally woke up one day thinking to myself “Hey, wouldn't it be awesome to have m1 Dictator?” and slaved away the day for Dictator. At the time, Dictator had higher armor than Viking while missing the same speed and maneuverability. This exposed me to a new playing style in the form of flanking, which involved just killing enemies from a somewhat hidden location (yes, it took me until Warrant Officer 3 to realize that this was a way to play). Memories of Dictator and Ricochet m1 in a Polygon CP map still revisit me from time to time, and the squareness of the Polygon map combined with the Bouncing nature of Ricochet’s shots was terrific to me. 9/10 Ricochet m1: This was perhaps the only stage where I truly enjoyed using Ricochet as a turret with any hull at all. Compared to its M0 modification, the M1 displayed a larger ammo clip size and fired faster with more damage. Additionally, the Ricochet effect, though far from mastered by me even now, was still quite fun to play with as I could often land blows to my enemies when they were unable to see me, and this left them baffled, to say the least. 10/10 Smoky m1: Among the list of dust-collectors I winded up purchasing was Smoky M1. I had only used the turret once in the same match as my Titan M1 and found that I lacked the damage to destroy an enemy tank as well as the firing rate to keep up a suppressive and intimidating fire. Smoky didn’t have any alterations at the time, which made things even more difficult for me. Additionally, one more concerning thing for me was the small explosion size which just felt somewhat depressing as opposed to Thunder for example. 4/10 Firebird m1: After being overly inspired to get this turret as I witnessed it savage might first hand, Firebird M1 was a great buy. The highlight of my experience was that I got this fantastic turret for a small 7,000 crystals, which was really cheap in retrospect although it did hit my crystal balance albeit mediocrely. I felt like I was fighting enemies like Autobot jazz, dancing gracefully through the battlefield without hesitating to pick fights and bring down even the toughest of my adversaries, but my opponents had a different view on the matter. They called me “Fire noob” which felt a bit demeaning to my newly acquired sense of pride. 9/10 Shaft m1: I decided to purchase this on Tanki’s 6th birthday instead of the far more logical Hornet M2. My excuse for a rationale was simple. If I had the turret that enemies used to make my life miserable, perhaps I could beat them and claim victory for myself. The few instances I did use Shaft proved to me that I could use the turret, although with significant difficulty. Needless to say, my attempt was mostly futile, and Shaft did end up just sitting in my garage as a reminder of my foolishness. 5/10 Thunder m1: This purchase came well into the M2 stage, although seeing as it was an M1 I decided to list it here. Thunder had been a turret I had a strange fascination (one might even argue an obsession with) since it caused big explosions. When I tried it, I almost mystically managed to hold my own to some degree (with a 0.89 KD I believe it was) and I did like what I saw so I decided to make sure I managed to M3 the turret one day, and now I stand with it being M4 which is quite frankly a dream come true. Despite my liking of the turret, I was unable to use it much as it seldom showed me results in the order of the 0.89 KD which I achieved in my first match due to protections. The reason I purchased this was as I also bought M2 Ricochet and I didn’t have crystals to M2 my Thunder. 7/10 Railgun m1: This turret was indeed amazing to me. At first, I had thought that if there wasn’t a big explosion, the turret couldn’t be good. When I obliterated tanks left and right with the help of my Railgun, I realized that a concentrated beam might also work (and in fact having high recoil corresponded to high damage!). Railgun M1 was most often put to use in conjunction with my Hornet or Wasp M1, both of which afforded me the peek-a-boo playing style. One of the sources of my frustration was, however, the fact that I couldn’t take part in XP/BP matches. 9/10 Hornet M1: This was one of my later purchases of the M1 stage, after realizing fully that I was incapable of using Viking M1. When I first unlocked this hull, I felt that it looked quite nice so I decided to purchase it. Hornet M1 showed me even more speed and armor than its predecessor with much, much better aesthetics. I used my Hornet M1 with Railgun and Isida M1, although after my fallout with the latter I used it almost exclusively with Railgun. 10/10 Wasp M1: I decided to foolishly purchase this hull without a sale as I ranked up to Warrant Officer 1. I didn’t truly enjoy using the hull as I couldn’t really fire my Railgun sideways while moving and also because Wasp lacked the armor needed to get me through much. I didn’t really use Wasp M1 for much except a little bit of parkour, and recently decided (for no apparent reason) to M3 the hull (more on that in the next part of my garage analysis). 6/10 The M2 Stage Since I had acquired a suitable M1 garage with many different hulls and turrets to play different roles in my arsenal, I decided it was best I start getting M2’s to combat the stronger opponents I faced. Hornet m2: Hornet M2 was my very first M2, and it served me well in most maps with most turrets. I managed to get it a rank after it unlocked. I had been hoping to get my hands around an M2, and I had somehow managed to resist the temptation to buy M1 Hunter or M1 Twins, so I had managed to get Hornet M2. I loved this hull’s handling as I could drift around with it. Hornet’s speed allowed me many good feats that I still recall (such as capturing a flag in an Iran match) although Hornet’s low armor didn’t afford me much battle and I had to make sure I attacked enemies when I was hidden to some degree. 9/10 Isida m2: This was my first turret at Major rank. I decided to M2 my Isida as I felt that maybe my previously held sentiments towards the turret would change and they did change drastically. I found Isida’s self-healing and better range keeping my feeble Hornet M2 alive longer than before. Equipped with my Hornet M2, I could reach and heal most patients, although I needed to sneak up on enemies to destroy them. I miraculously managed to rank up within a single week when using this turret in conjunction with my previously acquired Hornet M2. 7/10 Ricochet m2: I was, in fact, saving for Thunder M2 when I purchased this turret. In retrospect, I have not the slightest clue why I didn’t just wait the 10 or so days until the sale arrived, but one beautiful day I thought to myself “hey, wouldn’t Ricochet be awesome!” and decided to buy it before the sales came. Needless to say, my decision didn’t really help me as for some reason Ricochet M2 was much more difficult to use than its M1 counterpart (that or I became a nub with Ricochet). The same furnaces in which fires which sparked my initial love for Ricochet were now well within a degree of absolute zero. 4/10 Railgun m2: This turret was yet again another rash purchase. I had over 90,000 crystals saved up for the upcoming sales, where I planned to buy two or so M2’s. However, I once again gave in to the temptation of unlocking an M2 early and foolishly decided to splash all my crystals upon Railgun M2. I had seen its might firsthand, thanks to the multiple times my flag captures and gold box captures were ruined. As soon as I got the turret, I was blown away. Railgun M2 was an exceptional turret for me, and I had yet another phase of obsession with the turret. 10/10 Mammoth M2: After being extremely bored (or destroyed over and over and over again like Vehicon troopers, who knows?) with Hornet M2, I decided to get myself Mammoth M2 on a sale. Once again, my chief reason for choosing Mammoth M2 was first that I’d forgotten what it was like to be poor and desperately wanted to feel the same, and also because Mammoth was featured in one Thunder M2 and Mammoth M2 video and I thought I could do considerably well with the hull. I was amazed by this moving fortress, which managed to blows which could destroy my Hornet two times over and still crawl err walk away. 9/10 Thunder M2: If you’re tired of reading my sob story containing my abysmal financial choices, read on! This one is sure to amaze! This was another late M2 purchase somewhere in the higher ranks (near lieutenant general if memory serves) at a time where all M3’s weren’t unlocked at the rank of Marshal. Once more, I did have a few good matches with the turret, but nothing that mainly stuck out. In general, the turret felt pretty subpar, but I suppose that’s what you get when you purchase a turret seven ranks above when it should be bought. 6.5/10 Firebird M2: Believe it or not, I was planning to buy Thunder M3 at the rank of Brigadier. However, Halloween celebrations sent me into a completely different direction with Firebird M2. I had particularly liked Firebird since the M1 stage, so buying its M2 seemed a logical choice. At the time I bought it, it was probably the best choice I could have and should have made. I managed to pick fights with the strongest of adversaries and still avenge myself from beyond the grave through Firebird’s afterburn if an enemy withstood my ferocity when my tank was intact. Furthermore, it complimented my Hornet M2 wonderfully in virtually all maps and even managed to work with my Mammoth M2 in Hill or Island. 10/10 Striker M2: Despite it seeming suspicious, I very, fortunately, got an offer during a sale, reducing the price of Striker M2 to a measly 34,000 crystals. Needless to say, I was absolutely thrilled to go ahead and buy the turret as getting such a bargain is rare in Tanki. I wasn’t particularly impressed by Striker as it took too long to lock onto enemies and fire off a salvo, but then again I did buy it for just 34,000 crystals, so it didn’t feel that bad. 6/10 From the M0 to the M2 stage, my garage was painted with the marks of financial foolishness. Miraculously, I managed to gain some level of economic sense and how to optimize crystal use into the M3 and M4 stages, and surprisingly, the M2’s I bought did prove to be a significant aid in getting myself up to the M3 level and even then some. That's it for this part, I'll be covering the better of my stages in the next article about my M3 and M4 stages.- 16 replies
-
- 16
-
-
Guide Underrated Combos: Sting Like a Bee!
LOLKILLERTOTHEDEATH replied to LOLKILLERTOTHEDEATH in Underrated Combos: Sting Like a Bee! Newspaper Archive
Hornet and Hammer. Quite often, this combo is disregarded to the superior combination of Hammer and Viking. Nevertheless, after eating many doughnuts which should have been Kaisdf’s trying out the combination, I managed to realize the enormous potential presented by Hammer and Hornet when paired together in a Highland CTF. As such, I decided to write the guide you are about to close in the next five seconds now reading. Strengths and Weaknesses of the components Hammer: Hammer is among the few turrets in the game which has almost entirely different playing styles and tactics with various alterations. Nonetheless, at any level, Hammer bears a high amount of damage as well as boasting some of the most potent impact force in the game. Additionally, another merit of Hammer is the quick turning speed, which can help counter Freeze users to a certain degree. The primary drawback with any alteration equipped is the reloading between magazines and rounds. The High capacity ammo clip somewhat remedies the former alteration, while the latter can be fixed through the use of the Duplet alteration. Another major weakness of Hammer is the pellet spread, which can mean that it is entirely possible to miss your shot at point-blank range. Hornet: Hornet is a member of the group of hulls known as the light hulls, and shows said characteristics. Hornet’s most significant advantage is the fast speeds it can move it, which mean that it can quickly evade enemies, grab flags or attack an enemy and retreat. Another benefit of Hornet is its relatively small size, which affords it the luxury of venturing where other hulls cannot. As for disadvantages, Hornet’s HP leaves lots to be desired. This low amount of HP means that the user cannot engage in confrontations with most enemies and must resort to a more agile and stealthy combat style. Additionally, Hornet’s low weight means that when receiving fire, Hornet may be unable to turn or move thus and adequately be helpless. Hornet’s low weight also warrants caution when driving and firing, due to the high recoil. Hammer and Hornet: when used as a combo: In this case, one gets either a formidable combination or a laughable combination. As previously mentioned, Hammer has high damage and turning speed, but struggles with reloads of most forms. When paired with Hornet’s high speed and small size, it is paramount for a Hammer and Hornet user to use stealth and speed to their advantage. Even with protections, this combination is not durable. If under attack by an enemy with high impact force, Hammer and Hornet may be rendered entirely useless. Lay of the land: In Tanki, there are only six kinds of maps- small and cluttered, small and clear, medium and cluttered, medium and clear and lastly, large and cluttered and large and clear. Examples include (respectively): Ping Pong, Hill, Highland, Polygon, Dusseldorf and Lost Temple. Small and Cluttered: These maps are virtually impossible to find in Matchmaking, battles; however they are easily found in Pro battles. For these maps, protections against close range turrets is essential, but peek-a-boo tactics are quite relevant and can be your saving grace due to Hornet’s small size. Small and clear: Once more, these maps are only found in Pro Battles. Here, Hornet’s speed is useless because there is nowhere to go or hide. Additionally, due to the increased difficulty in maintaining a high K/D, one should hide behind stronger teammates and flank instead of assaulting enemies themselves. Lastly, protections are highly advisable depending on the situation. Medium and cluttered: These maps are generally not too easy to play on with Hornet and Hammer as the increased speed may cause you to keep bumping into walls and thus slowing down. Most of the time, using any form of ricochet is not going to work, which does render Hammer’s ability to ricochet one time useless. However, the far more deadly Ricochet’s unique ability also gets removed. Regarding protections, a single module protecting against a close-range turret and two protection modules which defend you from medium ranged turrets. Medium and Clear: Unlike small and clear maps, these maps will usually have plenty of cover to hide, they won’t have nearly as many props as the “medium and cluttered” category. This means that (if the correct paths are used) Hornet’s speed can be used to a high degree of success, while the peek-a-boo tactic is still viable. Protections should be against a close, medium and long range turret. Large and cluttered: These maps are also found only in Pro battles. In these larger maps, Hornet’s speed is invaluable, and the cluttered nature of the map means that a Hornet may pass through quickly and hide quickly as well, making it harder to hit with Railguns and Shafts. While Hornet sees an immensely more useful performance, Hammer loses its power due to Hammers relatively low range. Here, a single close, medium and long-range protection should be used. Large and Clear: Once again, these maps are only found in pro battles. Hornet’s speed remains the greatest asset of the combo, although it’s slightly less useful as there are fewer objects to hide behind, unlike in the “large and cluttered,” maps. Due to Hornet’s low HP, it is highly recommended that a user avoid the main path from one side to the other if travelling from one side to the other. Roles that can be played in a CTF match: Hercules: Not much to be said here. This is the stereotypical form of an attacker. This role involves a user using Hornet’s quick speed and Hammer’s high damage to ambush enemies, and leave a trail of destroyed tanks in your path before escaping quickly. There are many routes which can be taken. However attention should be paid to the courses which are either mined, closely watched or have many defenders guarding them as Hammer’s reload speed and Hornet’s low HP will prevent this. An attacker should also be creative in their entries; with a Viking, it might not be possible to jump over the ledge and onto the flag of the red team. However, it is very much possible and advisable with a Hornet. One thing to steer away from is using the conventional path (the vertical line from base to base) as this will expose your Hornet to much attention and potentially fire, which should be avoided. This role is ideal for veterans of Tanki, as it requires precise driving and firing, for even a single missed shot can have severe ramifications. If you prefer a slightly more laid back role or one which can instigate your enemies, read on until the next one! Bumblebee: Yes, I’ve named it after Bumblebee from Transformers In essence, this person is a sapper, stationed relatively close to enemy lines. Just like a bumblebee is notorious for stinging, a Sapper utilising Hornet and Hammer should cause chaos and irritate enemies. This role means that a player is helping out if your team flag needs to be retrieved, if your teammate is carrying the enemy flag to your base but receiving heavy fire or if a teammate is on the verge of destruction. The primary objective of a Bumblebee is to destroy as many enemies as possible. To make this strategy even more efficient, consider ramming enemies into walls and trying to push them around. Doing so is likely to frustrate your enemies and prevent them from focusing on people carrying flags but instead taking out their rage on your Hornet. The ideal locations for this role, are quite near what I call the “main” path. Hiding on either side of the walls of the blue and red base (depending on which team you are on) or behind cliffs is ideal. Although it may seem clear, one must be completely hidden for this tactic to work, while also changing positions periodically to avoid enemies from consistently killing you. I wrote this article to say just the following phrase: Sting like a bee! In a nutshell, this role is for those who like to support all-out assaults and have a knack for annoying enemies and dishing out damage if you prefer something where you are close to your teammates, perhaps the Joker’s for you. Joker: This role is somewhat similar to the Bumblebee, in that you are trying to irritate and destroy enemies. The critical place the Joker differs is that you are doing things at random. I don’t mean you are trying to parkour, kill enemies and then repetitively jumping off cliffs. The Joker is supposed to irritate enemies, but instead of just being restricted to irritating enemies and helping teammates, you fight randomly to avoid anybody from analysing your tactics and developing countermeasures. For example, the Joker should be the kind of player who’s willing to go deep into enemy territory to destroy a player who has planted too many mines. Regardless of the task, the Joker always leaps before looking and is more than happy to get killed in the process. This role is for the brave and the bold. If you want to play things safe, consider the (somewhat counter-intuitively named) Berserker. Berserker: The Berserker is the exact opposite of what it sounds. In Viking myths, Berserkers were warriors who (through the power of rage) would fight aggressively to the end. In the context of Tanki, these players are defenders with the desire for crystals and a taste for victory flowing through their veins (or arteries, not sure). While the Berserker may be invincible in spirit, Hornet can take a minimal number of hits, and as such, it is recommended that a Bersker takes cover after firing every shot (unless using the Duplet alteration, in which case the magazine should be used). The ideal way to do this is to hide in a location from where you have a clear and unobstructed view of the flag, but there has to be plenty of cover. Once an attacker arrives, stay as hidden as possible while burning through your ammo. If your enemy somehow survives the barrage of hits you deliver, try to block their path through parking your tank in front of them horizontally (this maximises your surface area, meaning that to get past you an attacker will have to take the longest possible turn). Ideally, users should have drones such as the lifeguard drone (to revive you if your tank gets destroyed as delivering a single shot can mean the difference between victory and defeat) or the saboteur, which will allow the user to plant surplus mines to at least disorient incoming attackers. Tactics: Needless to say, a multitude of tactics may be utilised here to ensure success. Following are a few that I find to work for me. These are not roles to play, but just strategies to rack up kills. Peek-a-boo: This tactic fits in with every role, except for the Joker maybe. The idea here is to hide behind a well, and if an enemy gets to close, to fire a shot (or two if the user has the Duplet alteration equipped) and then retreat into cover, only to repeat the strategy. Most of the time, enemies will easily spot you and proceed to attack you, so finding an area which is well supported by teammates or is littered with props can aid in survival. Circle-strafing: Yes, I realise that this tactic is only for Freeze users; however it is still viable. Hornet’s high speed combined with Hammer’s high turning speed means that if done correctly, it is possible to emerge unscathed. The most significant limitation here is Hornet’s low armour and low weight. If an enemy is using a turret with high impact force or damage, the user circle-strafing may be knocked out of the circular path or be destroyed. Blind shooting: Yes, I know. “But LOLKLILLERTOTHEDEATH, you said this section is about killing enemies, how can firing blindly do that? Hmph?” When I say “Blind shooting” I do not mean that you should shoot a wall at random and expect a kill. This tactic is particularly useful against a horde of enemies. To use this technique, you should find to walls reasonably close together, and hide behind one. Then, go from the first wall to hide behind the second wall while firing as many shots or magazines as possible, and then continue to repeat as you see fit. The reason this is the optimal way to deal with enemies is that hordes of enemies mean lots of ammunition being fired at your somewhat fragile Hornet. If you shoot and hide, Hornet’s high speed may let you hide from some enemies or at the very least distract your enemies from players attempting to steal the flag. Types of shots: No, Tanki has not decided to in fact add different kinds of shots to Hammer. When I say types of shots, I mean the different ways you can fire to achieve unique results, such as causing chaos or making enemies miss. These shots will not work every time, and they depend on a good many things going correctly. If you manage to master these different shots, you can be a force to be reckoned with. Good luck next time: This type of shot is geared towards making an enemy miss. To perform this trick optimally, try to shoot at the corner of an enemy’s hull when they look to be about ready to fire a shot. While this is not likely to work on heavy hulls, It can make your enemies miss their shot, saving you a great deal of trouble. Nonetheless, this trick will probably not work efficiently on a Twins or Freeze user. Nevertheless, the next method does work on those pesky, close ranged defenders. The Consider driving lessons: This shot is nearly identical to the previous shot, with one significant difference. This type of shot can be tricky to pull off, but if you manage it, you will be able to escape enemies attacking you. To do this, wait until an enemy is near a prop, and once the enemy is near a prop, fire at the enemy in a way such that your shot lands on the corner of their hull. Which side? Well, make sure it lands on the same side as the prop. Not only will this trick put some distance between you and your enemy (in the case of Hornet), it will also disorient them and let you escape should you need it. The Captain America: This shot is more of a last-resort kind of shot, although it can be used however the user should desire. If you find yourself near enemies around a corner when you have little hope for recovery, try to ricochet your shot off the wall to land a hit. The tank you fire at will realise that you hit them and proceed to attempt to engage you. At that point, start moving away from your enemy while shooting back. The Half and Half: Before I describe this shot, I should add that this is the most difficult shot to master, and even then it’s effectiveness is somewhat questionable, although if it does work out, you look and feel great. The only time this shot should be used is if you are near a prop with sharp corners and two enemies approaching you. In this case, make sure your turret is pointing towards the corner of the wall and fire. If you do it right, your pellets will be split in half, and one half will go to the right while the other goes to the left, damaging both enemies. Still not sure what I mean? Take a look at the images below! Alterations: As I mentioned before, alterations can play a massive part in specific turrets, and Hammer is most certainly one of those turrets. Duplet: This is by far the most common alteration. What the Duplet alteration does is take your regular three rounds and turn it into two rounds, while making the time between rounds zero. In Nerf terms, this alteration allows you to “slam-fire.” The benefit of this alteration is that your enemies have no respite from the damage you inflict upon them, and thus they can’t wait for you to finish and then use a repair kit as they might not survive. The drawback to this alteration is that if you’re out of both or a single round, you need to reload to a full magazine of two. It is worth noting, however, that pressing the spacebar once will not fire off both your shots. Due to the ability to inflict the damage of two shots in the time needed for one, the Duplet alteration is a must-have. Slugger: This alteration makes the vertical and horizontal pellet spread far lower while lowering the turning speed of Hammer by 70%. That is to say, that the pellets from your shot will have a much smaller distance between them, even at higher ranges, allowing for more long ranged combat. At first glance, this alteration can be deemed extremely helpful as longer ranges might help mitigate unnecessary damage from enemies through utilising Hornet’s speed. The lower turning speed can be problematic if you do have to engage enemies at closer ranges. If you can manage with turning your turret slower and prefer longer range combat, this alteration may lend itself well to your skill. The use of this alteration depends upon the user’s playing style. As such, this alteration is not a must-have but rather welcome addition to any garage. Adaptive reload: The most pricey of all the alterations for Hammer, this alteration adds two rounds to your clip for every enemy destroyed while making the reload time for your full clip longer by 20%. The benefit of this alteration is that Hornet is fast, which means you may be able to catch up with and destroy enemies, adding two rounds to your clip. The biggest problem is the game mode. This alteration appears to be geared towards Death Matches, where everyone is an enemy and therefore finding enemies is no trouble at all. In a team-based mode such as Capture The Flag, this is not the case and the time between rounds and the even higher time between clips may prove to be debilitating. As such, this alteration is recommended only for collection purposes for a CTF lover. Dragon Breath: A bit of a misnomer, because as evidenced clearly when Bilbo Baggins met Smaug the dragon, Dragon breath does not burn; it stinks! This alteration should be called “Dragon Fire.” this alteration gives your Hammer the ability to inflict after burn alongside your regular damage, akin to Firebird. You still have your regular damage with some extra burn damage factored in. The more pellets you land on your enemy, the more damage you inflict. The drawback for this alteration is that the pellet spread is increased by 20% (both vertical and horizontal) which means that your pellets will land further from each other. The primary application for this alteration is for players who love the peek-a-boo tactic or the Captain America shot. As such, this alteration is a must-have for players who play more stealthily, but it is a welcome addition to a player who’s more aggressive. High-Capacity Ammo Clip: This alteration had its golden age before the release of the Duplet alteration when it could unleash five potent shots. This alteration makes your clip almost doubly large, at a total of five rounds per clip, but the time taken between each shot increases by 10% and the time taken between each clip increases by 35%. For users who may remember fighting against this somewhat overpowered alteration, it was two things: A nightmare, and virtually never sported on any hull spare Viking. While the former might make the alteration formidable, there was a highly logical reason for the latter. After using calculus including the Taylor series and the Zeta function regularization some basic mathematics, it becomes evident that firing 5 shots with the alteration takes a grand total of 16.75 seconds, while firing 3 shots with no alterations, waiting for the clip to reload and then shooting another 2 shots takes only 14 seconds, with firing 6 shots without the High-Capacity Ammo clip alteration taking 15.8 seconds. Essentially, it is easier to fight without this alteration as 6 shots can be fired without the alteration in the time it takes to shoot 5 shots with the alteration. Combined with Hornet’s low HP, the increased waiting time can be debilitating to a user. As such, this alteration is recommended only for collection purposes. Protections: In most previous articles regarding turrets and hulls, there have been numerous suggestions about which protections should be used and when. For example, Inferno was a favourite in Island and Emerald was a favourite in Polygon. Then, during the disintegration update modules such as the Badger-TA became popular. Now, users have the flexibility to utilise whichever protection modules. For that reason, the ideal way to go about this would be to hit the speed boost and race around the enemy base, trying to discover which turrets are being used by the enemy and then equipping your protections based upon three factors: Firstly, which turret is the most common. Secondly, which turrets do you have high protection/ any protection against. Third, Which role do you intend to play? The first factor is more of one size for all kind of solution so that you have maximum protection against as many enemies as possible. The second factor should be considered because if your enemies are M4 Railgun users, and you have a 10% resistance to Railgun, it will not be of any help to you. The third factor is crucial to consider. If you are going to be the Joker, expect to run into longe range turrets, and players who colloquially “camp,” if you are going to be an attacker, mine protection, as well as protection from Freeze and Magnum, may be essential. One thing to keep in mind for a Matchmaking battle is the low time, and so this whole process should last anywhere from 15 to 65 seconds. Conclusion: Hammer and Hornet are very ferocious and even highly effective combination if utilised correctly. Remember to try and find how you fit into your team (Whether you’re a Hercules, A bumblebee, A Joker or a Berserker) and try to master the special shots as they may save you when it counts. Make sure you leverage Hornet’s speed and small size for maximum benefit and take some time to do some recon and deduce which turrets you need protections against.- 19 replies
-
- 14
-
-
Story [Issue 81] Fear the Nipah: Genesis
LOLKILLERTOTHEDEATH replied to LOLKILLERTOTHEDEATH in [Issue 81] Fear the Nipah: Genesis Newspaper Archive
“Come to think of it Steven, I don’t know why I trusted you,” Elizabeth mumbled, looking Steven in the eye. “Relax Elizabeth, it wasn’t personal. I was on a mission.” “For what Steven? To deliver me to this maniac?” “Well see that’s where things get more complicated. For one, it’s his mission that’s personal-” “And for another, I’m not a maniac Ms Elizabeth. Among those you and your pathetic little army fought to kill was my father. I was with him that day, and I watched as shot after relentless shot tore through his once solid chest. By the time the bullets stopped, and the smoke cleared, he lay dying on the floor, gasping for breath. On that day, I took an oath that I’d bring you down by any means necessary.” “Oh, so your father was part of an evil legion that tried to kill us all in cold blood?” Elizabeth yelled. “Kill you? Please, we liberated you. Instead of gasping for breath and spitting blood in your final moments, your people died as warriors, fighting till death took them.” Elizabeth crumpled to the floor, whimpering. Then suddenly, her robotic enhancements kicked in, and she found herself punching Dave. “Well, let’s not get too feisty,” Dave exhaled as he caught Elizabeth’s blow with precision and then knocked her out. “Clean that up, Steven,” Dave commanded. Meanwhile, Elizabeth was in another place. She found herself in a small room, with very few men. She knew inside that the incoming enemy forces would give her a swift demise because her robotics were not functional. If not that, the fact that a large part of her body had stopped working would kill her. “I know this day hasn’t gone as we planned. There’ve been lots of setbacks. I’m not gonna sugarcoat it; we’re all going to die. Now I don’t know about any of you, but if I am going to die today, I won’t die until I’ve massacred at least a few of our oppressors. I’m willing to use empty magazines, my teeth- anything to do that. I’ll win, or I’ll die fighting, but there’s no bloody way I will die like a coward.” Elizabeth felt her spirit sink with every bullet shot, and then she made her way out into the battlefield. Once she and her soldiers were out on the battlefield, it was a free-for-all. Elizabeth emptied bullet after bullet into her enemies, while taking a few shots of her own. Once that was done she ejected the magazine of her gun and used it to hit a soldier repeatedly, and stun another, only to use a broken brick to kill him. She felt a thud on her head and collapsed near a wall, watching many of her comrades die in front of her. “Any last words or wishes? Make it quick, and stay still, I’m a lousy shot” a soldier pointed a gun at Elizabeth’s face. Seconds later, she noticed a figure approaching over the horizon. Tall, lean and heavily armed. “Yeah, just one. Do me a favour and die!” The man raised his gun and killed Elizabeth's former captor and then helped her up. With her head in pain, Elizabeth woke up with a jolt, in a cage. The putrid smell of her own blood greeted her nose as she stood up. Her new-found strength and knowledge helped her open the door of the cage with a single punch. She stepped out and tried to find her way to Dave. “Looking for someone?” Dave stepped out of the dark. “You really should stop doing that,” Elizabeth said as she began to run towards Dave, who refused to move. Once in range, Elizabeth punched Dave once more to no success. “You really should stop using that same tactic Elizabeth,” Dave muttered as he twisted her wrist. “I did Dave,” Elizabeth reached for a pistol which was lying on the floor and emptied the three bullets it did have into Dave’s stomach. Dave’s strength receded, and he slowly moved backwards. Elizabeth ran towards him and prepared herself to deliver the killing blow. “Any final words Dave?” Elizabeth said as she raised her hand and prepared to punch Dave. “Just one. NEVER WOUND WHAT YOU CAN’T KILL!” Dave punched Elizabeth hard enough not only to send her flying into the roof but also to make a massive dent in it. Elizabeth crumpled in pain as one of her eyes stopped working. “Don’t worry Elizabeth, I won’t bother giving you the same luxury!” Dave lifted Elizabeth by her shoulder and punched her thrice. He was just about to deliver a final blow to kill Elizabeth when a canister fell in front of him. As soon as it exploded everything went white. By the time everything was clear again, Steven had punched his face repeatedly as well as bullets raining down near him. “I always knew something about you was off Steven!” Dave punched Steven into a wall, and used the two soldiers, who had seemingly been killed, to hurt Steven even more. Dave levelled his gun at Steven’s forehead, and before the bullet found its way onto Steven’s head, Elizabeth caught it. “ENOUGH IS ENOUGH ELIZABETH!” Dave flew into a rage and tore of the robotic arm Elizabeth had, leaving her in agony. Dave took aim at his former colleague and fired a bullet. “That doesn’t… feel… so good… does it?!” Elizabeth yelled. Dave looked down at his chest only to find a katar embedded in his heart. Steven stood up. “We are… done,” Steven said. “The plane’s directed to Dave’s biggest base of operations, without anyone to land it we’ll have destroyed the base with the crash of this plane Elizabeth.” Without hesitation, Elizabeth, Steven and the two men grabbed parachutes and jumped out of the plane. Hours later, they found themselves being tended to in a hospital. -
Sorry about the confusion everyone! I made a mistake.
-
Is there any function which has no derrivative? I don't mean like trying to find the derrivative of 1/x at the point (0.0000000000000000000000001,100000000000000000) but in general (as in a function which has no derrivative) Sorry if the zeroes aren't correctly present.
-
Not in Pro battles.
-
Give 3 reasons why tanki is still a good game
LOLKILLERTOTHEDEATH replied to TankiNoob2000 in Archive
1) Great forum community (for the most part) 2) Great and kind developers (they ask and take note of our opinions, games like Contract Wars don't care what players want.) 3) Being a helper (in the case of helpers) is fun. You get to work with great people and help others as well. 4) Viking M4. I love the hull, it is awesome. 5) Magnum M4. I love the turret, it's incredibly fun to use. 6) Discounts and sales. Tanki is very generous with these. 7) V-log. It unites the tanki community (pretty much) and also shows transparency on Tanki's part. 8) A real-time multiplayer (unlike MCOC) 9) A variety of combos designed to suit every single tanker. 10) Fun to play. Some might disagree, but Tanki is very fun to play. 11) Gold Boxes are also fun. They are the most intense 10 seconds one will have on a regular, day to day basis. 12) XP/BP is also quite nice, it puts your reflex and prediction skills to the ultimate test 13) Updates are also quite frequent and while some may not be the best, most are quite alright. This helps a lot if you have a turret (such as Freeze in the past) which was too OP and needed a nerf. 14) Pro battles. You don't randomly have to play with/against certain players, you can chose unlike in Clash Royale. 15) Details. Not the peak/best, but Tanki developers put lots of time into making sure that the grass looks somewhat like grass. -
That can happen sometimes as well, although generally it isn't common. I've been quite tied up the past couple of days so I might not be able to help much in the AWS.
-
Not really. Longer ranges are much more difficult for the average Magnum user. The problem is, that with turrets such as Railgun or Shaft, you only have to worry about the horizontal component of your shot. With Magnum, the vertical component comes into play as well. That means that I have to make sure that my initial velocity and angle are at least roughly alright. The fact that the splash damage got nerfed means that it's very difficult for a Magnum user to land hits successfully because of the fact that 0:100 (angle to power) doesn't cut it as it falls down. I'd say that maybe a buff of 200-300 damage points or something similar would make it balanced.
-
Honestly, Magnum is very helpless now. At close ranges, it should be able to do at least alright. I don't mean kill every enemy, but at least a 25% sucess rate. I cannot kill anyone and am defenseless as soon as I spawn. Also, Magnum by design is not meant to land direct hits. That is for Railgun and Shaft. The rest is great as usual!
-
So my record essentially ties.
