 Jump to content


Person_Random

-
Posts
2 545 -
Joined
-
Last visited
-
Days Won
46
Everything posted by Person_Random
-
hbty shoul be happy someone talked lol... but i was saying is that i get bored waiting... everyone does sometimes. Although coincededences happen a lot... hmmm... though the letter writer in question was a little bit more rude to me than i was to them....
-
Just say there are no buildings... haha. I'll try to find the original file. Position? Rejected Guest Writer and Resident Boring Storyteller. I've editorialed once but it took 5 months to write and two whole months to publish! I had to wait a full rotation before I could get myself in there. Urghhhhh... they love former reporters but not me. They make me wait a full rotation but everyone else gets to go instantly... or near instantly
-
Hmmm, more exclamation mark shortage. Where could everyone else be? Seeing that no one else is here, maybe I could go and vent about how it will probably be about two years before my year in tanki article is published... talk abot procrastination~!
-
And so...
-
lol
-
Islands don't have buildings :P I did remember you said something like that. That was a week ago. How about 2222?
-
good luck then!
-
Was there an exclamation mark shortage earlier?
-
Nice clickbait there... might want to try other link lol
-
Stars getting DELETED from the Game... come on... I hate them.
-
Lol I did it offline on my notebook.
-
I suppose I'll be enlightened next year as I am taking AP Physics
-
I did that last year. Gave up midway.
-
Randomness can be measured in entropy (please don't beat me up for the fact of the day). Do you like to play Tanki?
-
Whoops... I may have *accidentally* taken it.
-
Sorry, I suffer from Noobomia, so I cannot stop being a noob.
-
As long as you keep neutral - oh wait, that's impossible.
-
A Year (and some) of MM...
Person_Random replied to Person_Random in A Year (and some) of MM... Archive
Hey, it's been a whole year since MM (matchmaking) was released. I can't help but say that I've lost a ton of Tanki friends and grown increasingly frustrated with the game. Your thoughts? -
Happy Birthday Tanki!!!
-
Hmm I never noticed this topic got opened again? By the way, do you like chocolate?
-
Long time no see mod. Heheeee ikr all movie plots so predictable... I just watched a movie in English and predicted the ending. Anyways nice job, hopefully you'll be writing more!
-
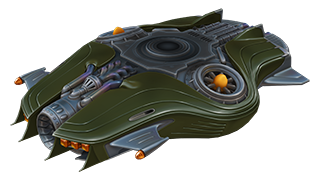
New drone, and MM versions for Stadium and Chernobyl!
Person_Random replied to theFiringHand in News Archive
lovely -
Don't forget Shaft... kinda like Railgun but more precise aim.
-
I use it for my english essays because my teacher tells me to and occasionally on my 150 page novel so I can spam some word count, but otherwise, not really.
-
I'd have to agree too, I was thinking it was a nature poam until I read the title (during my first impression)
